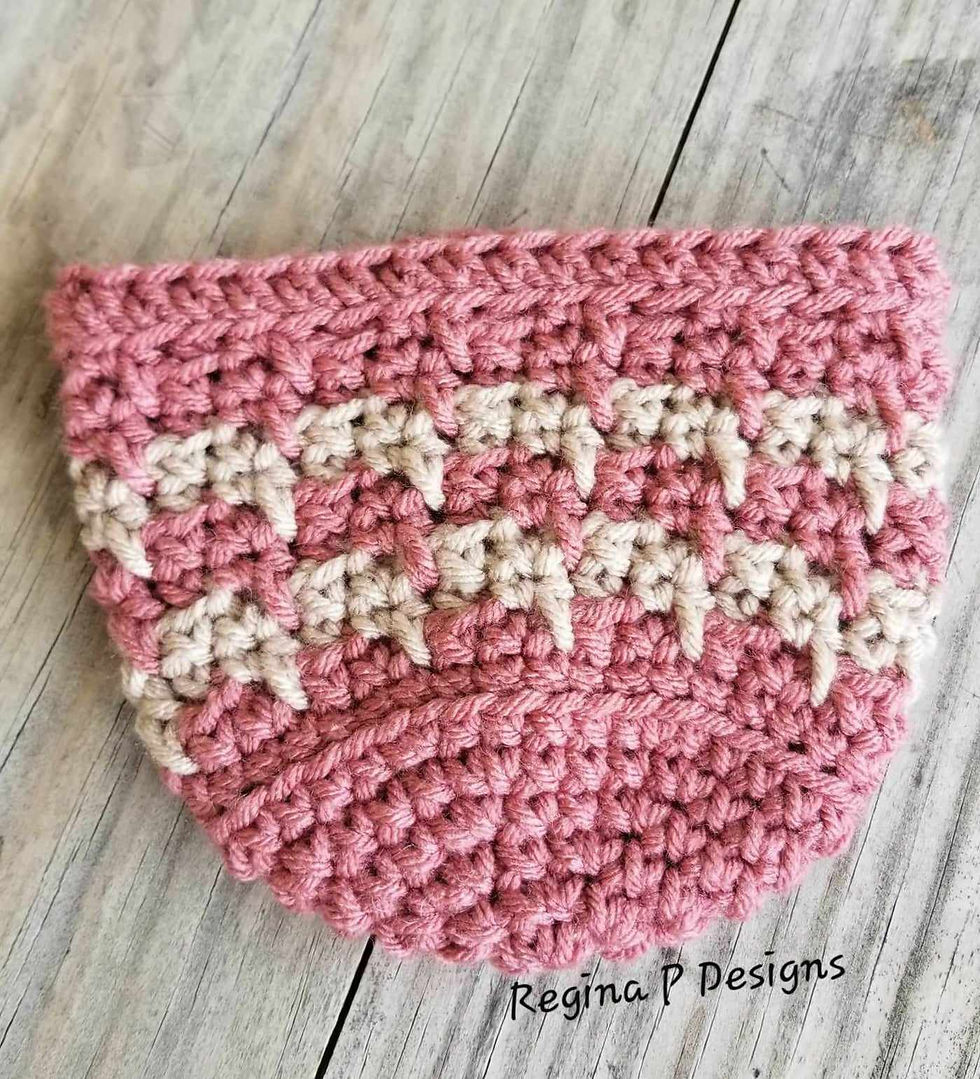
Parvaim Cup Cozy Pattern
- Regina P

- Oct 21, 2022
- 4 min read
Updated: Jan 26, 2023
While building stock for craft shows this year my brain decided I needed to design 8 new cup cozy patterns instead!
While I feel absolutely blessed by the inspiration, the timing couldn't have been worse. Then again I did end up with 24 cup cozies to add to my inventory even though they took triple the time to make with the pattern writing thrown in there too.
Cup cozies are one of my favorite things to use. My poor little hands just can't handle the extreme hot or cold of to go beverages be it one of my favorite mango smoothies or a delicious pecan sticky roll coffee from our local shop. Not to mention how stinking cute they are!
I had planned to hold off testing on all these designs until the new year and then create an e-book with all of them included, but my plans are always changing. When the amazing Pam from Carroway Crochet told me about her upcoming pattern hop I knew I needed the perfect design to add to the mix, so away this one went to my Super Hero Testing Team. I can't rave enough about this amazing group of ladies! They put up with my crazy amount of tests, always come through and make me look better in the process.

I love this stitch pattern so much I've also created a hat pattern with it that will be coming out later this year. I'm sure there will be more coming after that too so keep an eye out.
Here's what you'll need to get started...........
Materials:
Yarn Bee Soft & Sleek Yarns in 2 colors(approx. 55 yds total)
H(5mm) Hook
Scissors
Needle
Abbreviations(US Terms):
SK = Skip
sts = Stitches
ST = Stitch
SL= Slip Stitch
CH = Chain
SC = Single Crochet
HDC= Half Double Crochet
DC = Double Crochet
BLO = Back Loop Only
SPK = Spiked Stitch
DEC = Decrease
FP = Front Post
BP = Back Post
CA = Color A
CB = Color B
Notes: This pattern is worked bottom up. Final measurement with this pattern should be approximately 4” wide at the bottom, 5” wide at the top, & 4” tall.
To begin CH 28 & SL to your beginning CH to connect
ROUND 1: CH1(does not count as a ST, SC in each CH around, SL to your beginning SC to connect(28)
ROUND 2: CH1(does not count as a ST, place 2 SC in the first ST, SC in the next 13 sts, place 2 SC in the next ST, SC in the last 13 sts, SL to your beginning SC to connect(30)
ROUND 3: CH3(counts as your first DC), DC DEC, DC, CH2/SK1, repeat(DC, DC DEC, DC, CH2/SK1) 5 times, SL to the top of your beginning CH3 to connect(30)
Change to CB
ROUND 4: CH1(does not count as a ST), repeat(SC 3 sts, place SPK DC/CH1/SPK DC in the skipped ST on round 2) 5 times, SL to your first SC to connect(30)

(photo shows where to place the SPK DC/CH1/SPK DC, work the sts over the CH like it doesn't exist)
Change to CA
ROUND 5: TURN, SL into the first CH SP, CH1(does not count as a ST), repeat(2 SC in the CH SP, CH 5) 6 times, SL to your first SC to connect(42)
Change to CB
This round you will be working in the skipped sts of round 4(CB) and the SC sts of round 5(CA)
ROUND 6: TURN, repeat(SK the CB DC, SPK SC in the CB SC, *SC BLO in the next 2 CB SC sts, SPK SC in the CB DC, SC BLO in the next 2 CA SC sts) 6 times, SL to your first SC to connect(36)

(*for these 2 BLO sts go behind the CH, pretend it isn't there and work in the previous row of the same color as your working yarn.)
ROUND 7: CH1(does not count as a ST), SC in each ST around, SL to your beginning SC to connect(36)
ROUND 8: CH3(counts as your first DC), DC DEC, DC next 2, CH2/SK1, repeat(DC, DC DEC, DC next 2, CH2/SK1)6 times, SL to the top of your beginning CH3 to connect(42)
Change to CA
ROUND 9: CH1(does not count as a ST), repeat(SC, SC DEC, SC, place SPK DC/CH1/SPK DC in the skipped ST on round 13) 6 times, SL to your first SC to connect(36)
Change to CB
ROUND 10: TURN, SL into the first CH SP, CH1(does not count as a ST), repeat(2 SC in the CH SP, CH 5) 6 times, SL to your first SC to connect(42)
Change to CA, cut & tie off CB
This round you will be working in the skipped sts of round 9(CA) and the SC sts of round 10(CB)
ROUND 11: TURN, repeat(SK the CA DC, SPK SC in the CA SC, *SC BLO in the next 2 CA SC sts, SPK SC in the CA DC, SC BLO in the next 2 CB SC sts) 6 times, SL to your first SC to connect(36)
* for these 2 BLO sts go behind the CH, pretend it isn't there and work in the previous row of the same color as your working yarn.
ROUND 12: CH1(does not count as a ST), HDC in each ST around, SL to your beginning HDC to connect(36)
ROUNDS 13 & 14: CH1(does not count as a ST), repeat(FPDC, FPDC, BPDC, BPDC) 9 times, SL to your first DC to connect(36)
Cut, tie off, & weave in all of your ends.

BEFORE YOU GO, PLEASE GO ADD A FAVORITE HEART TO THIS FREE PATTERN ON RAVELRY!
CHECK OUT THESE CREATIONS FROM MY SUPER HERO TESTER TEAM!

This pattern is
Available for purchase
or
in my Ravelry Store HERE
DON'T FORGET to check out this month's
©Copyright 2022, Regina P Designs All Rights Reserved. All Content Copyright and other rights reserved by Regina P Designs. No Content May Be Duplicated Without Express Written Consent.
By using any Regina P Designs patterns, you agree to the terms of use:
All Regina P Designs Patterns are for personal use only
It is prohibited to: reproduce, copy, publish(in any Form including video) or distribute this pattern, its parts or photos in any way or form, including translations into foreign languages.
You are free to do as you wish with the finished products made from these patterns with the agreement that Regina P Designs will be credited for the pattern itself.


Comments