
Search
Mushroom Bookmark Crochet Pattern
- Regina P

- Apr 16, 2024
- 3 min read
Updated: Mar 23
While trying to come up with some more bookmark designs to build stock for the cute little boutique that I gratefully get to display my wares in I created these cute little mushrooms. After whipping up a bunch I sent it off to my amazing testers to get it perfect to share with all of you.
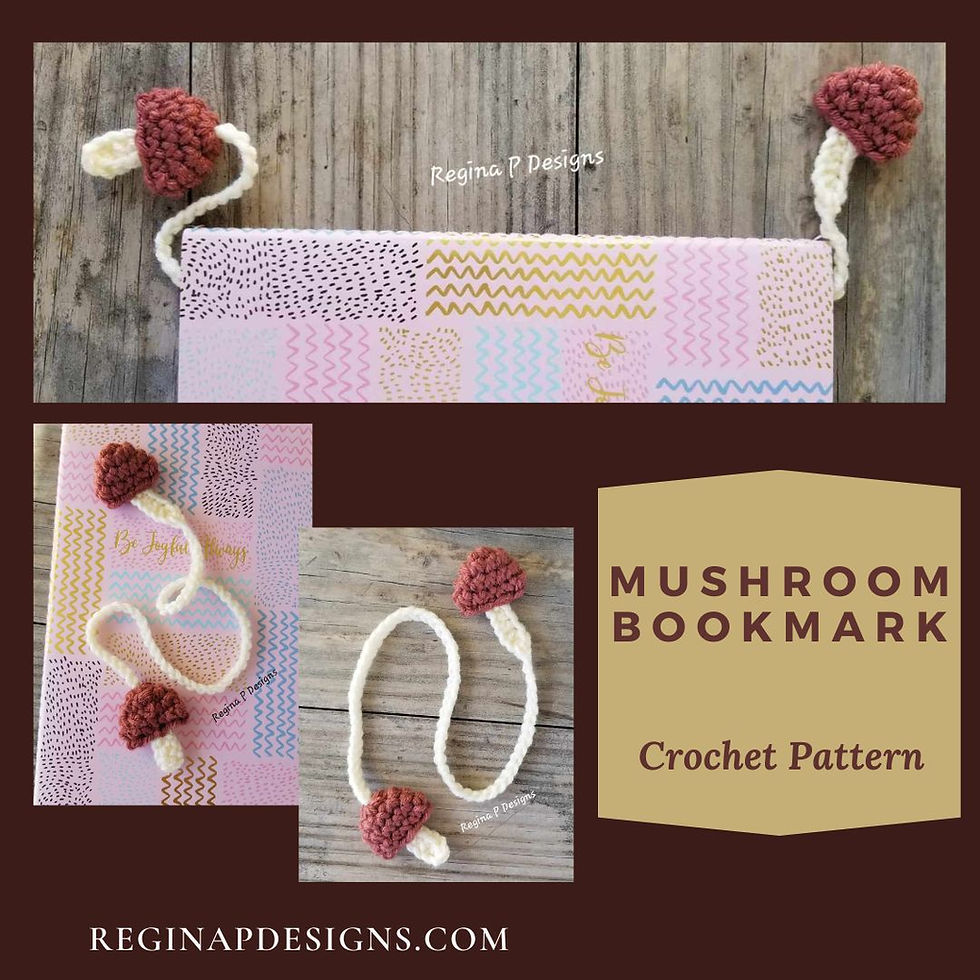
Grab a handful of any WW4/Aran/10Ply yarn scraps and make up a few of your own. Feel free to adapt the chain length in STEP 2 to any length you want.
Here's what you'll need to get started.......
Materials:
Yarn Bee Soft & Sleek Yarns(approx. 12 yds total)
G(Boye 4.25 mm) Hook
Scissors
Needle
Abbreviations(US Terms):
SK = Skip
sts = Stitches
ST = Stitch
SL= Slip Stitch
MR = Magic Ring
CH = Chain
SC = Single Crochet
HDC = Half Double Crochet
DC = Double Crochet
NOTE: You can even use the first mushroom steps to create earrings or a keychain if you like!
CREATE 1 STEM: CH 6, place 2 HDC in the 2nd CH from your hook, HDC in the next CH, SC in the next 2 CHs, SL in the last CH, cut & tie off.
Set the stem aside and make one mushroom cap.
Mushroom Cap
To begin create a MR
ROUND 1: place 6 SC in the MR, SL to your first SC to connect(6)
*pull your MR shut tightly for the first cap, leave it open enough to slide your long chain through for your second cap later.
ROUND 2: CH 1(does not count as a ST), repeat(3 SC, SC, SC) twice, SL to your first SC to connect(10)
ROUND 3: CH 1(does not count as a ST), SC in the first ST, 2 SC, SC in the next 4 sts, 2 SC, SC in the next 3 sts, SL to your first SC to connect(12)
ROUND 4: CH 1(does not count as a ST), SC in each ST around, SL to your first SC to connect (12), cut leaving a longer tail & tie off.
First cap: Flatten your cap so that your seam is in the back center. Stuff your MR starting tail & your stem tails inside the cap. Position the stem centered inside the cap opening so that a small portion is inside the cap. Use the cap ending tail to sew the opening shut including working through the stem to secure it to the cap.


Create the second Cap following rounds 1-4.
Now follow the directions below for the second stem and chain portion.
CH 6
STEP 1: place 2 HDC in the 2nd CH from your hook, HDC in the next CH, SC in the next 2 CHs, SL in the last CH
STEP 2: CH 60, cut and tie off leaving a longer tail.
Flatten your cap so that your seam is in the back center. Feed the ending tail of you second stem's long chain up through the inside of your second cap and through the MR til a small portion of the stem in inside and the rest is popping out the bottom of the cap. Pull your MR tail tightly to close. Hide all tails inside except your cap ending tail.


Position the stem centered inside the cap opening so that a small portion is inside the cap. Use the cap ending tail to sew the opening shut including working through the stem to secure it to the cap. Now thread your second stem ending tail into your needle. Attach the Chain portion to the bottom of your first completed mushroom.


DON'T FORGET to check out this month's
Grab the FREE printable display tags for your bookmarks
in my shop NOW!


The PDF download of this pattern is available for $1.49 in my Ravelry Store HERE
If you have any questions about this pattern or any of the other patterns from Regina P Designs, or want to show off your finished projects with this pattern, please join our Facebook group.
©Copyright 2024, Regina P Designs All Rights Reserved. All Content Copyright and other rights reserved by Regina P Designs. No Content May Be Duplicated Without Express Written Consent.
By using any Regina P Designs patterns, you agree to the terms of use:
-All Regina P Designs Patterns are for personal use only.
-It is prohibited to: reproduce, copy(to include screenshots), publish(in any Form including video) or distribute this pattern, its parts or photos in any way or form, including translations into foreign languages.
-You are free to do as you wish with the finished products made from these patterns with the agreement that Regina P Designs will be credited for the pattern itself.


1 Comment
Rated 0 out of 5 stars.
No ratings yet
love this cute pattern! thank you